A fence is only as dependable as the posts holding it up. When you install fence posts with the right depth, spacing, materials, and drainage, the finished fence is more likely to stay straight through heavy rain, summer heat, gate use, and changing soil conditions. When those details are rushed, even attractive panels and quality gates can begin to lean, sag, or shift.
For homeowners, business owners, and landowners, post installation is where long-term fence performance begins. The right method depends on the fence material, the purpose of the enclosure, the terrain, and the local conditions on the property.
Start With the Fence’s Job
Before digging the first hole, define what the fence needs to do. A six-foot wood privacy fence has different structural demands than a chain link enclosure, ornamental aluminum fence, livestock fence, or temporary construction barrier. A gate opening needs stronger support than a standard line section, while a commercial perimeter may require deeper posts, heavier steel, and more deliberate access planning.
Property lines and utility locations matter just as much as material selection. Confirm the planned fence route, check local permitting or neighborhood requirements when applicable, and have underground utilities marked before excavation begins. A small adjustment to avoid a buried line, drainage swale, tree root system, or easement is much easier to make before posts are set.
On properties in League City, Friendswood, and Clear Lake, low-lying areas and saturated ground can affect both post depth and drainage. Standing water around a post is not simply an appearance issue. It can accelerate wood deterioration, soften soil, and contribute to movement over time.
Plan a Straight Layout Before You Dig
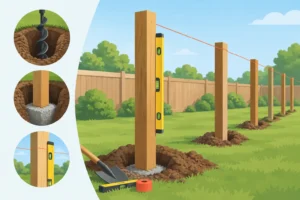
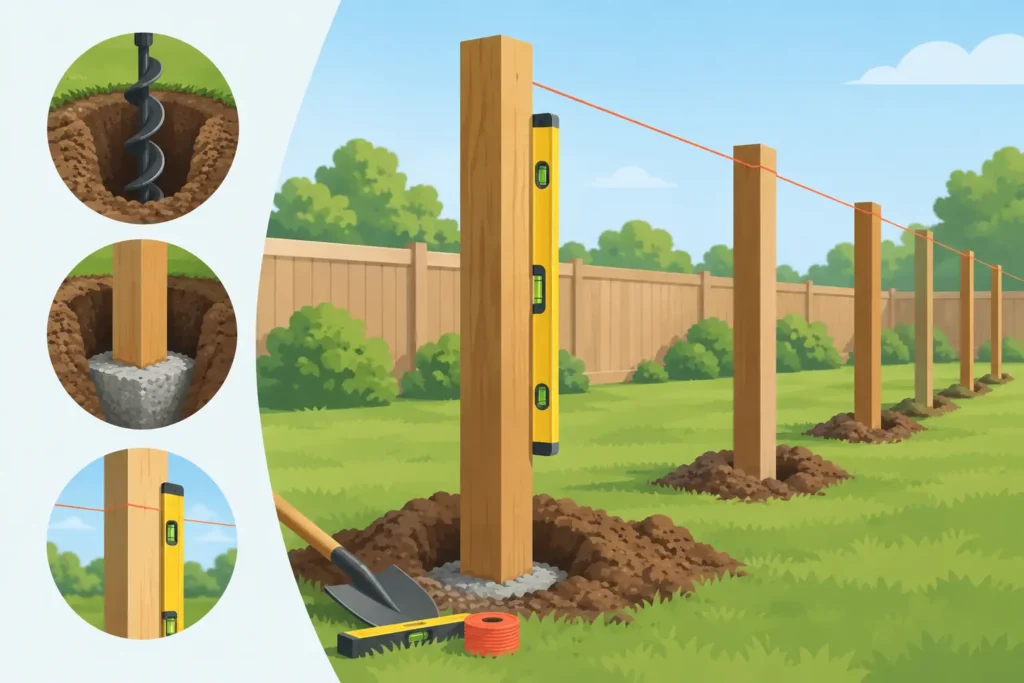
A professional-looking fence starts with a precise layout. Set corner locations first, then run a taut mason’s line between them to establish the fence line. Mark each post position along that string, keeping spacing consistent with the fence system being installed.
Most residential wood fence sections use posts spaced about six to eight feet apart. The correct distance may be shorter when panels are heavy, ground slopes, wind exposure is high, or a custom design calls for it. Metal, chain link, ranch, and ornamental systems each have their own spacing requirements, so avoid applying one layout rule to every fence type.
Corners, ends, and gate posts deserve special attention. They carry more load than line posts, especially where tension, latch hardware, or wide gates are involved. These posts often need larger holes, stronger materials, and deeper setting than the rest of the fence. A gate that will be opened every day should never rely on undersized or loosely set posts.
Choose Posts Built for the Environment
The post material should match the fence style and expected use. Pressure-treated wood remains a popular choice for privacy fencing because it offers a traditional appearance and works well with custom designs. Cedar can provide a more refined natural look, although the structural post itself still needs to be suited for ground contact and local moisture conditions.
Galvanized steel posts are common for chain link fencing and can also reinforce wood privacy fences where extra strength is needed. Steel, aluminum, and ornamental fence systems typically use manufacturer-matched posts and brackets designed for that specific product. For ranch and agricultural fencing, post choices may include treated wood, pipe, T-posts, or heavy-duty steel depending on livestock, acreage, and terrain.
Do not select posts based on appearance alone. A thinner post may cost less at the start, but it can become the weak point in a fence exposed to wind, soil movement, or repeated gate use. Quality fence construction balances the visible finish with the structural support below grade.
How Deep Should Fence Posts Go?
A reliable rule is to bury roughly one-third of the total post length, with depth adjusted for the fence height, soil type, and load on the post. For many six-foot privacy fences, posts are commonly set around two to three feet deep. Taller fences, exposed properties, loose soil, and gate locations may require greater depth.
The hole should also be wide enough to allow for a stable concrete footing or properly compacted fill. A narrow hole can make it difficult to position the post accurately and may not provide enough support around it. As a general working range, a post hole is often about three times the width of the post, though larger structural posts require a larger excavation.
Depth alone does not guarantee stability. A post installed deeply in poorly drained soil can still move or deteriorate. The installation method needs to account for water management at the bottom and sides of the hole.
Gravel and Drainage at the Base
A layer of gravel at the bottom of the hole can help water move away from the end of a wood post and provide a firmer base for setting. This is particularly helpful in areas where the soil stays wet after storms. The post should rest on a compacted base rather than loose, muddy soil.
Drainage is not a substitute for proper materials. Any wood post placed below grade should be rated for ground contact. Cutting corners here may leave the fence vulnerable to premature rot where repair is most difficult.
Set Each Post Plumb and Secure
Place the post in the hole, align it with the string line, and check it for plumb on two adjacent sides. Bracing the post before adding concrete or fill prevents it from shifting while the material is placed and compacted. This step should be repeated for every post, not just the corners.
For many permanent residential and commercial fence installations, concrete provides a durable footing. Mix and place it according to the product directions, keeping the post positioned accurately throughout the process. Shape the top of the concrete so it slopes slightly away from the post. That simple crown helps reduce water pooling at the post base.
Some fence applications use compacted soil, gravel, or other methods instead of concrete. This can be appropriate for specific agricultural, temporary, or engineered systems, but it depends on the fence design and ground conditions. A contractor should consider the expected load, wind exposure, drainage, and service life before deciding on a setting method.
Allow concrete-set posts adequate curing time before hanging heavy fence sections or gates. Rushing this stage can pull posts out of alignment before the footing develops its intended strength.
Account for Slopes, Corners, and Gates
A level yard makes post installation easier, but many properties have grade changes that require a more thoughtful approach. A fence can follow the slope of the land in a smooth, racked line, or it can step down in sections. The best choice depends on the fence style, the desired appearance, and whether gaps under the fence could create a security or containment issue.
Corners need to remain square and firmly anchored because they direct the entire fence line. Use accurate measurements rather than relying on visual judgment alone. A fence can look straight from one angle while gradually drifting off the property line or creating uneven panels farther down the run.
Gate posts should be treated as structural supports, not ordinary line posts. Their size, depth, footing, and hardware must match the gate’s width and weight. A well-built custom gate is an asset to a property, but only when its support posts are installed to handle daily use without sagging.
Common Mistakes That Shorten Fence Life
The most frequent fence failures usually begin below ground. Setting posts too shallow, skipping layout lines, using untreated lumber in soil contact, and failing to brace posts during installation can all create problems that show up later. So can placing a post directly into standing water or finishing the concrete flat so it traps moisture.
Another mistake is treating every post the same. Line posts, end posts, corners, and gate posts serve different roles. Giving the highest-load locations additional support protects the entire fence system.
Finally, do not overlook the fence material’s installation requirements. Aluminum panels, chain link fabric, steel rail systems, and wood pickets each connect to posts differently. Correct post placement keeps rails level, panels secure, and gates operating smoothly.
A properly installed post system is not the most visible part of a finished fence, but it is the part that protects the investment. For a privacy fence, commercial enclosure, ranch boundary, or custom gate project, careful planning and skilled installation create the stable foundation that lets the rest of the fence do its job for years to come.